New Page 2


Welcome to SDR!

  • Amused
  • Angry
  • Annoyed
  • Awesome
  • Bemused
  • Cocky
  • Cool
  • Crazy
  • Crying
  • Down
  • Drunk
  • Embarraded
  • Enraged
  • Friendly
  • Geeky
  • Grumpy
  • Happy
  • Hungry
  • Piratey
  • Poorly
  • Sad
  • Shy
  • Sneaky
  • Tired
  • + Reply to Thread
    Page 1 of 3 1 2 3 LastLast
    Results 1 to 15 of 33

    Thread: my new build

    1. #1
      FDdragon is offline Registered User
      Enter Status Here..
       
      I am:
      Happy
       
      Join Date
      Feb 2014
      Location
      92154
      Posts
      1,648

      my new build

      So i picked up a 60g cube a while back and decided to start putting it all together.

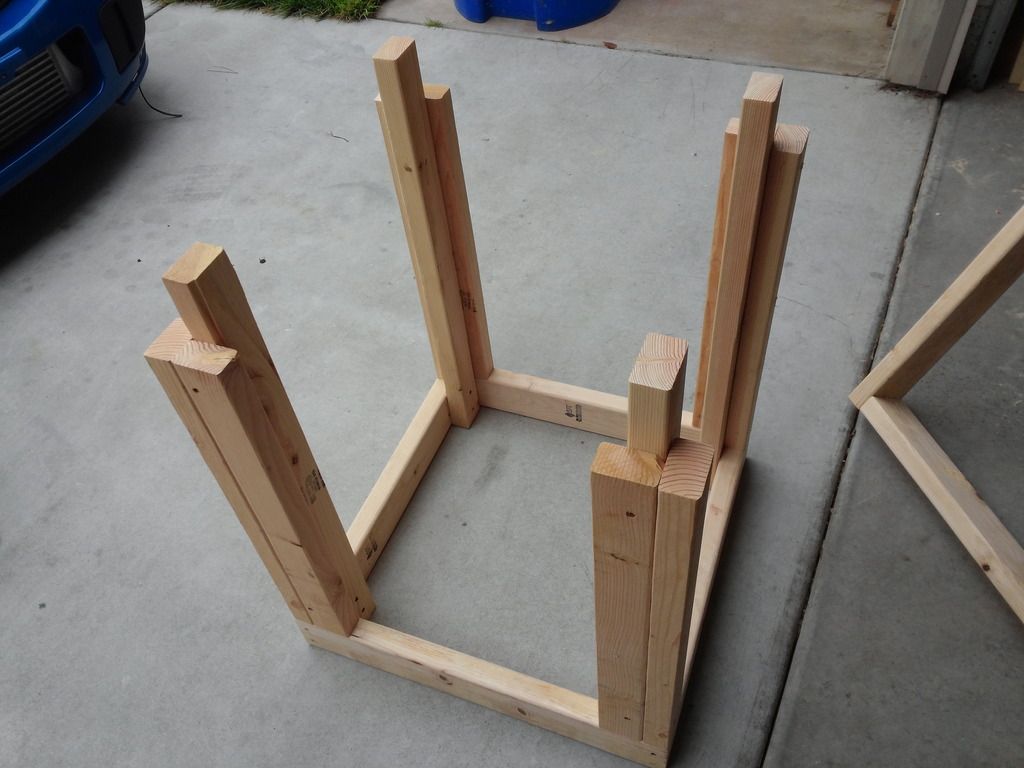
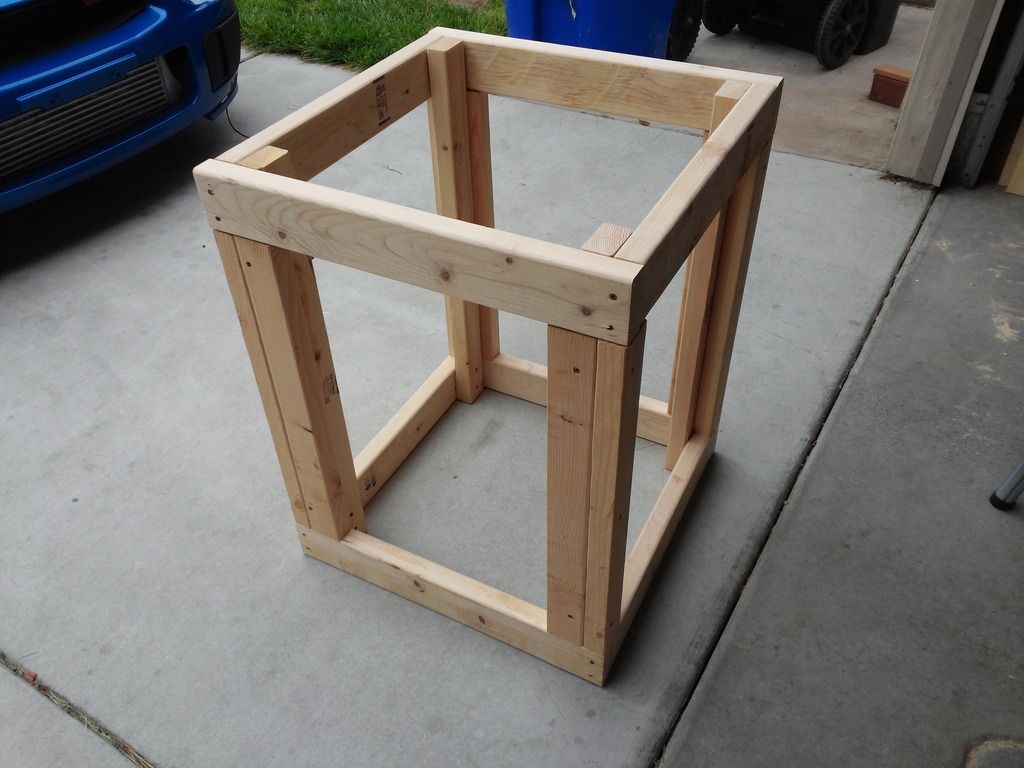
      Here is the stand im making. Maybe a little overkill but i thought "why not". He he
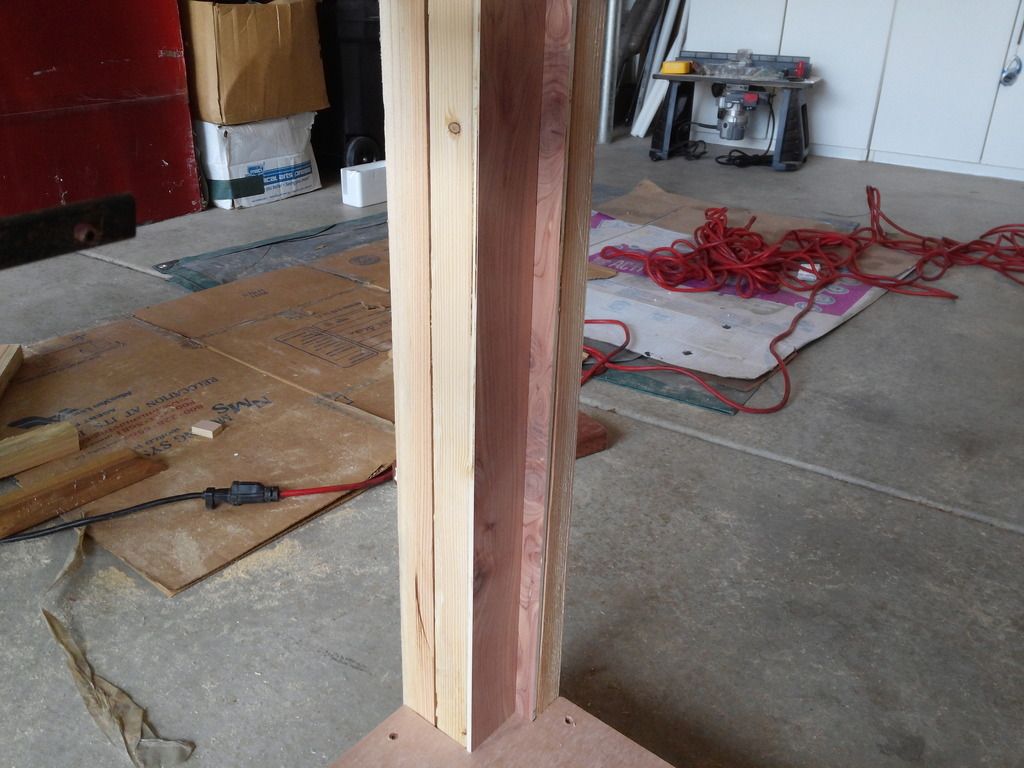
      2x3s and 2x4s for frame.


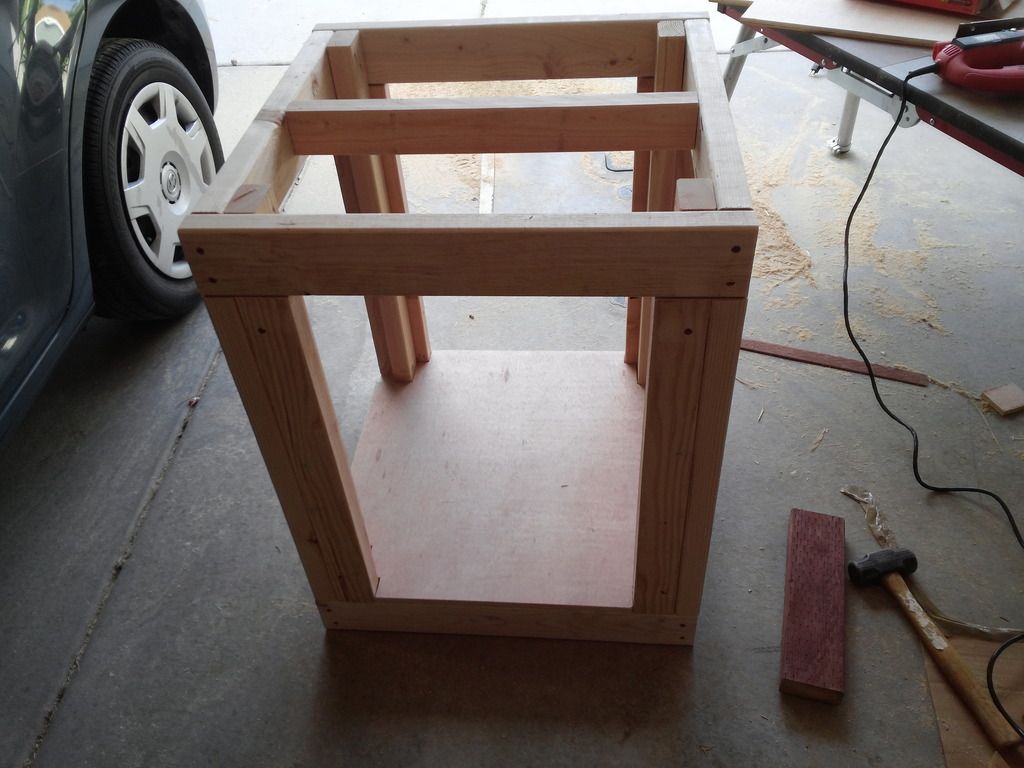
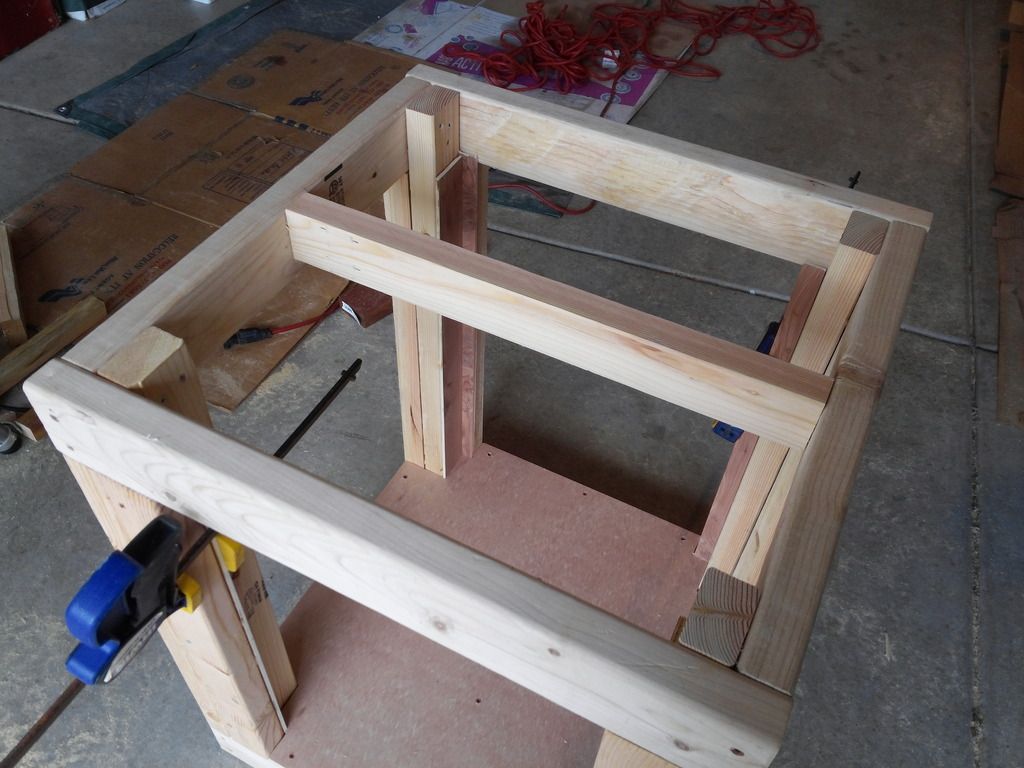
      Added a top joist, two bottom joists and the bottom decking.


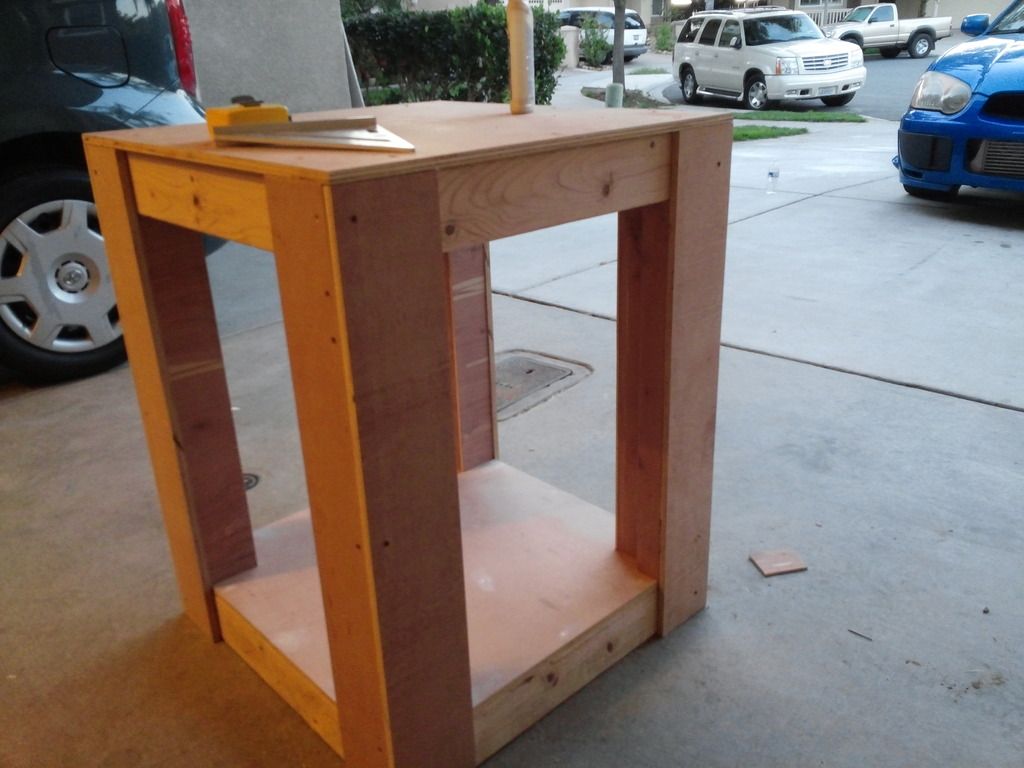
      Decided i didnt want to see 2x material when i open the doors so i started sheathing the interior.


      Here is the exterior skinning.


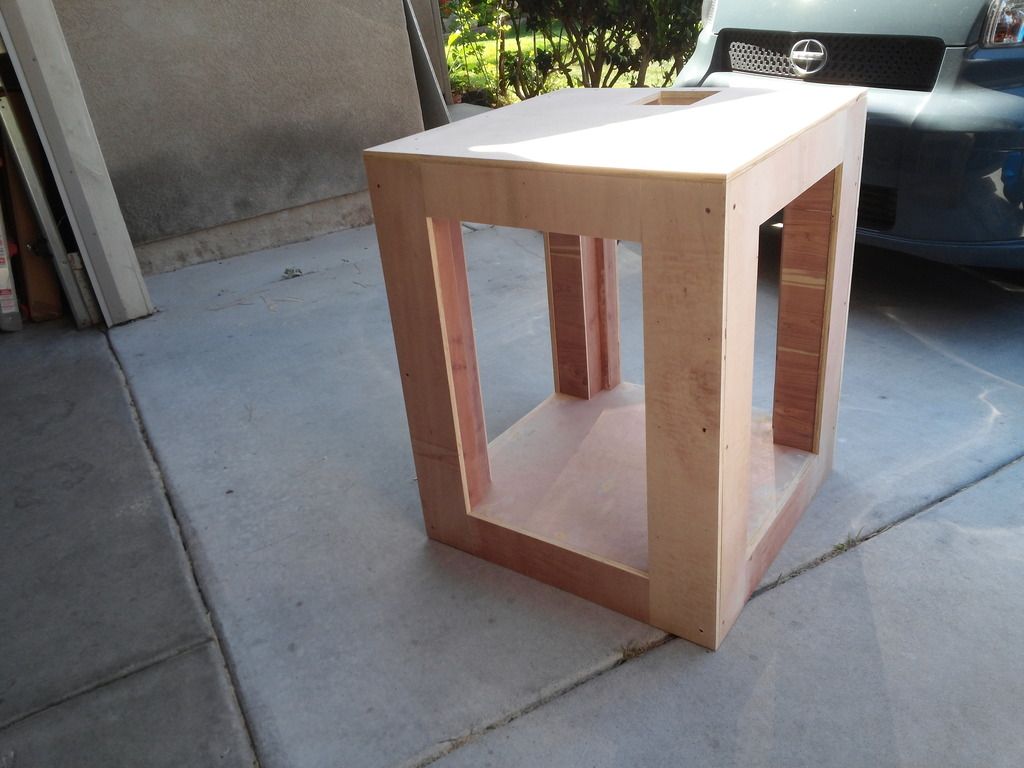
      All skinning complete. And i cut out a section for the plumbing.


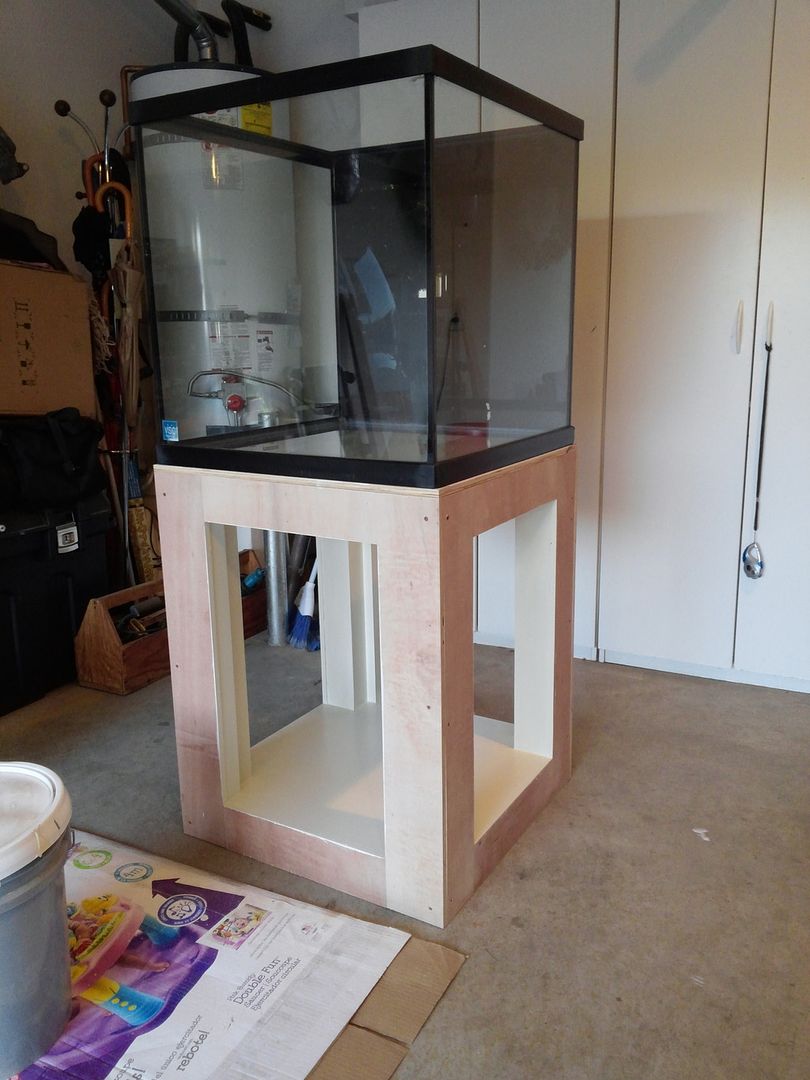
      I like natural looking wood but im going to paint it to protect it. Already applied first coat on interior. I also need to add the corners, top, and bottom trimwork...plus 3 doors. Back will remain open.
      Last edited by FDdragon; 06-06-2015 at 08:35 PM.

    2. #2
      OhioStreetz is offline Registered User
      My status is: Run with the best F()ck the
      rest!!!
       
      I am:
      Sneaky
       
      Join Date
      Aug 2013
      Location
      Point Loma
      Posts
      3,523
      Damn looks good bro

    3. #3
      FDdragon is offline Registered User
      Enter Status Here..
       
      I am:
      Happy
       
      Join Date
      Feb 2014
      Location
      92154
      Posts
      1,648
      Thanks bro. Its getting heavy, ha ha.

      Im painting the interior white and the exterior black.

    4. #4
      CMD2213 is offline Registered User
      My status is: Downgrade to upgrade
       
      I am:
      Tired
       
      Join Date
      Dec 2013
      Location
      Rancho Bernardo ,Ca.92127
      Posts
      6,828
      Nice Juan

    5. #5
      KorL is offline Registered User
      Enter Status Here..
       
      I am:
      Set you mood here...
       
      Join Date
      Mar 2008
      Location
      Temecula
      Posts
      3,800
      Looks good. I vote not to paint exterior. And just add some trim.

    6. #6
      FDdragon is offline Registered User
      Enter Status Here..
       
      I am:
      Happy
       
      Join Date
      Feb 2014
      Location
      92154
      Posts
      1,648
      I thought about it but all my furniture is black, so i think i will still paint it. Plus it should allow more visual focus on the tank itself.

    7. #7
      omarrubio is offline Registered User
      Enter Status Here..
       
      I am:
      Friendly
       
      Join Date
      Jan 2014
      Location
      tj
      Posts
      702
      Very nice!

    8. #8
      goof89 is offline Registered User
      My status is: HANGING LOOSE
       
      I am:
      Piratey
       
      Join Date
      Dec 2014
      Location
      Chula Vista
      Posts
      1,064
      Looking good brotha...good luck with the rest.

    9. #9
      nanoreef1 is offline Registered User
      My status is: 83Reefs
       
      I am:
      Amused
       
      Join Date
      Jun 2012
      Location
      San Marcos
      Posts
      7,521
      Quote Originally Posted by FDdragon View Post
      So i picked up a 60g cube a while back and decided to start putting it all together.

      Here is the stand im making. Maybe a little overkill but i thought "why not". He he
      2x3s and 2x4s for frame.


      Added a top joist, two bottom joists and the bottom decking.


      Decided i didnt want to see 2x material when i open the doors so i started sheathing the interior.


      Here is the exterior skinning.


      All skinning complete. And i cut out a section for the plumbing.


      I like natural looking wood but im going to paint it to protect it. Already applied first coat on interior. I also need to add the corners, top, and bottom trimwork...plus 3 doors. Back will remain open.
      Dang bro didn't think u could build stand like that! How much was the cost of material if you don't mind me asking? Looking sic!

      Sent from my SM-N900T using Tapatalk

    10. #10
      FDdragon is offline Registered User
      Enter Status Here..
       
      I am:
      Happy
       
      Join Date
      Feb 2014
      Location
      92154
      Posts
      1,648
      The 2x was around $15, the plywood was $32.( i still have a little plywood leftover but the cost of one full sheet was cheaper than buying the smaller pieces i only needed for the build) i had a little of the thin cedar i used on the inside, so i didnt have to spend on that. A box of screws cost me $7. And i had paint leftover but it would cost about $5-7 for the paint. (I go to walmart or homedepot for the mistinted colors and get about 50%)

      You can buy a 16foot 2x4 at homedepot and cut it into the sizes you need....for about the same prices as the smaller sections would cost individually.
      Last edited by FDdragon; 06-07-2015 at 04:42 PM.

    11. #11
      FDdragon is offline Registered User
      Enter Status Here..
       
      I am:
      Happy
       
      Join Date
      Feb 2014
      Location
      92154
      Posts
      1,648
      First coat of interior paint. I was looking for bright white.....but i got more of an eggshell. Guess that what i get for buying the discounted paint. Ha ha.

    12. #12
      OhioStreetz is offline Registered User
      My status is: Run with the best F()ck the
      rest!!!
       
      I am:
      Sneaky
       
      Join Date
      Aug 2013
      Location
      Point Loma
      Posts
      3,523
      You gonna build some doors or leave it open?

    13. #13
      FDdragon is offline Registered User
      Enter Status Here..
       
      I am:
      Happy
       
      Join Date
      Feb 2014
      Location
      92154
      Posts
      1,648
      Im building doors...on front and sides. Back will be open

    14. #14
      nanoreef1 is offline Registered User
      My status is: 83Reefs
       
      I am:
      Amused
       
      Join Date
      Jun 2012
      Location
      San Marcos
      Posts
      7,521
      Looking real nice bro!

    15. #15
      FDdragon is offline Registered User
      Enter Status Here..
       
      I am:
      Happy
       
      Join Date
      Feb 2014
      Location
      92154
      Posts
      1,648
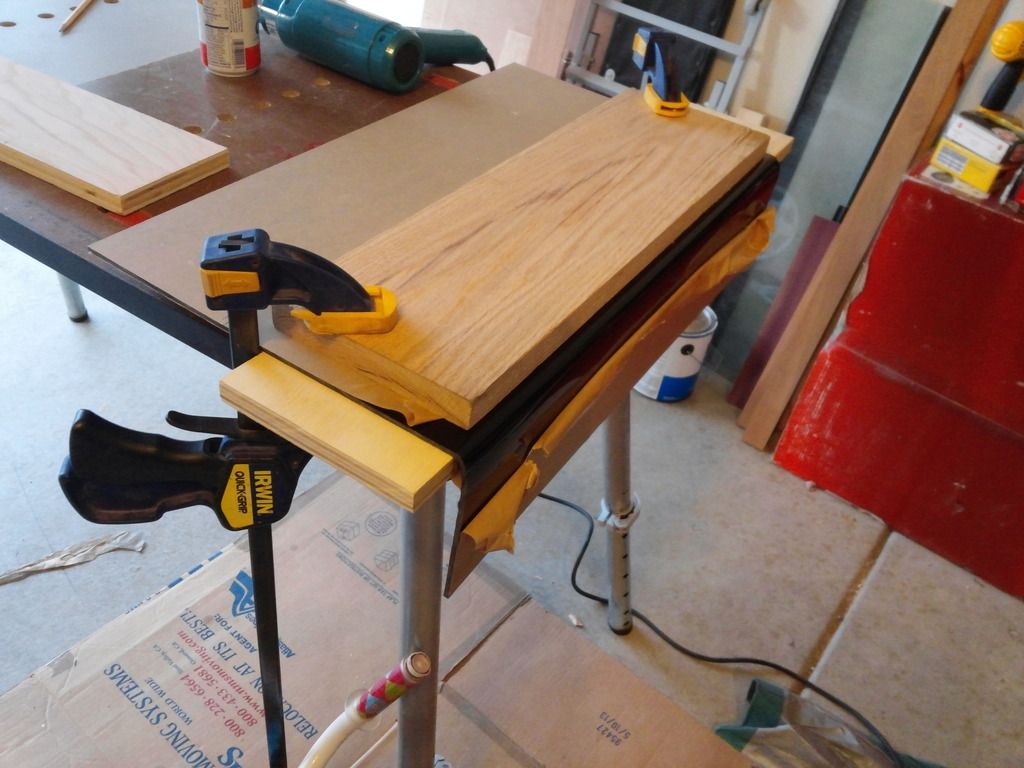
      Ive been a little busy with work and all but here is my overflow box.

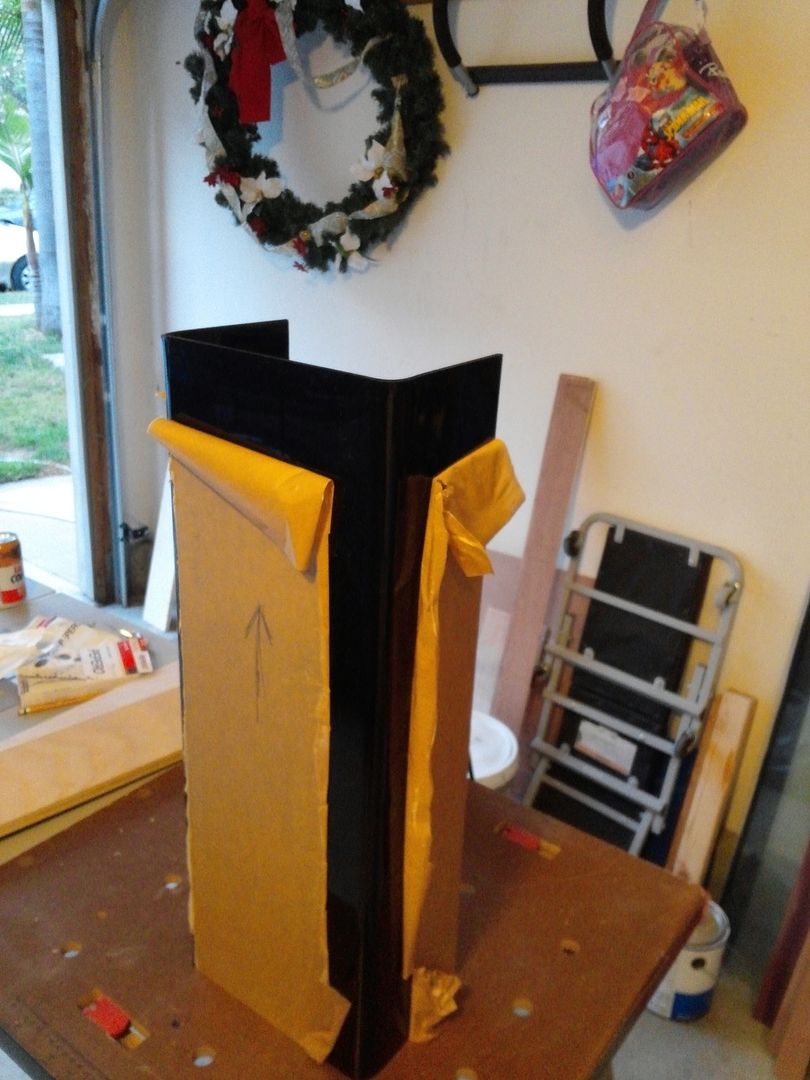
      Used a heatgun to bend the acrylic (with plenty of ventilation). Took about 30-45 minutes heating each side. It was gonna be a while and thought about grabbing a Snickers, but i settled for a can of coffee.


      Here is the bends finished.


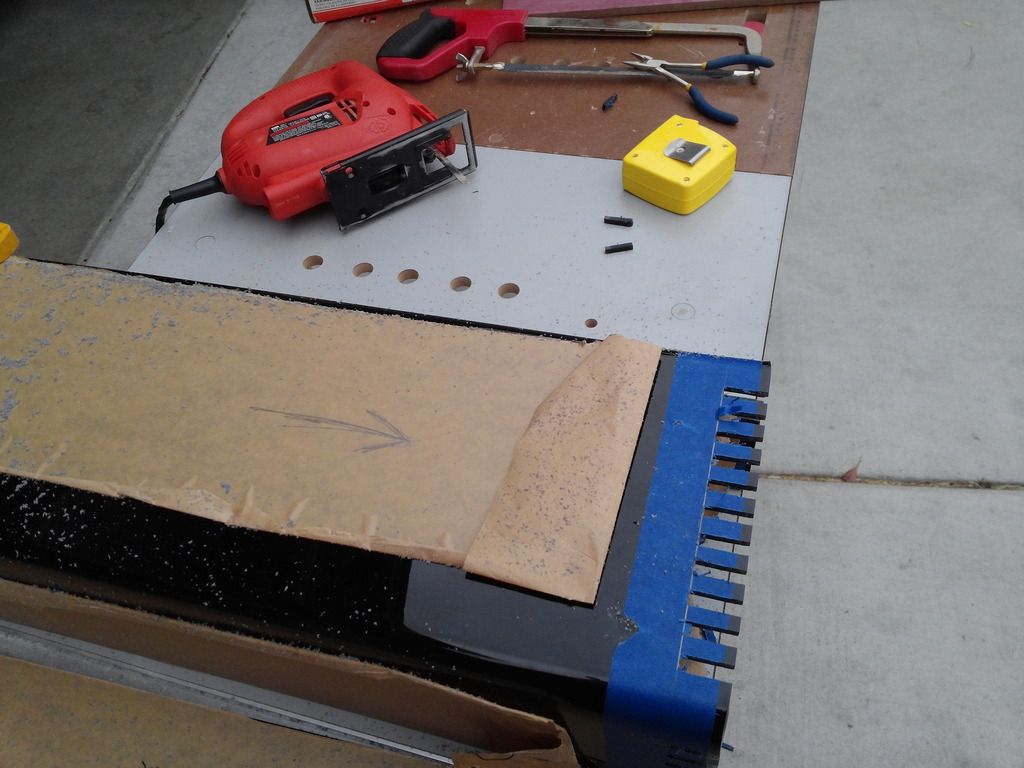
      I marked out the slots i needed to cut for waterflow. Made the slots 1/4" each and left a 3/8" space between each one. (I didnt want to accidentally break off a piece so made the spaces a little wider to have that extra little strength.) I used the masking tape to mark on and help reduce chipping the acrylic.
      I started the cut by scoring it with a hacksaw then followed by a jigsaw. Was easier than expected and not too messy.
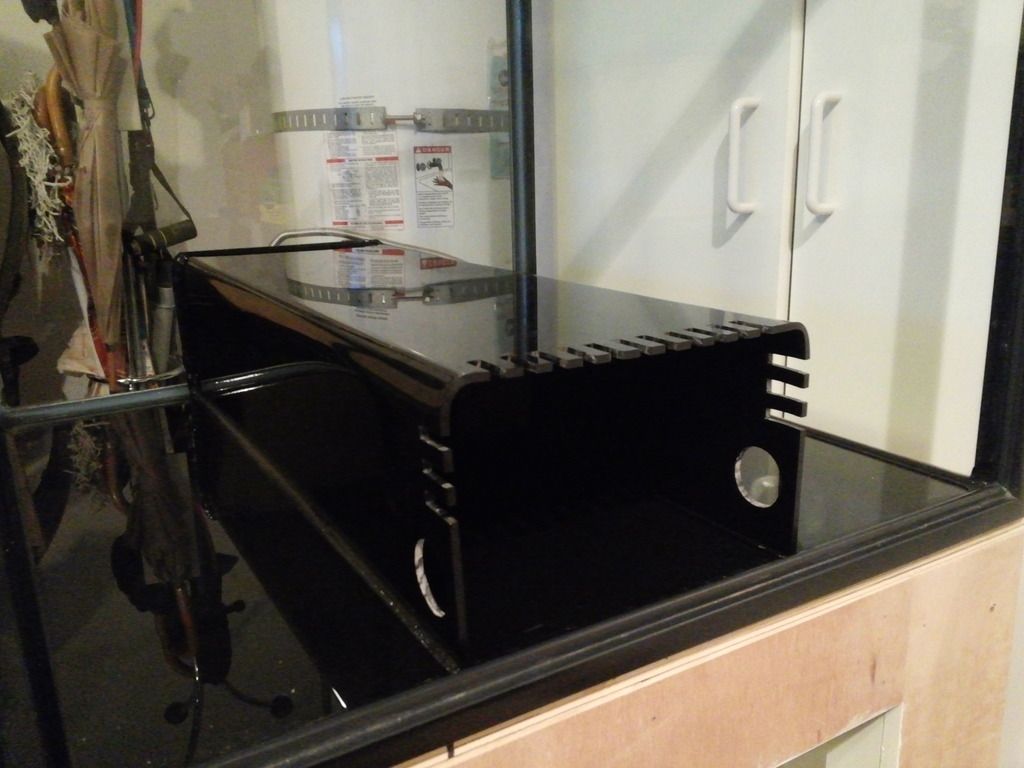
      You cant see it in this pic but i made the two holes(one on each side) for return using a dremel.

      Here is the finished overflow in place. I used black sealant and letting it dry now.

      I am pretty messy so i used masking tape on the outside edges if where i was applying sealant. Then smoothed the sealant with my finger and removed the tape as soon as it was all applied. (I didnt want the sealant drying on top of tape and making it hard to remove later.)
      Last edited by FDdragon; 06-11-2015 at 05:59 AM.

    + Reply to Thread

    Thread Information

    Users Browsing this Thread

    There are currently 1 users browsing this thread. (0 members and 1 guests)


    Posting Permissions

    • You may not post new threads
    • You may not post replies
    • You may not post attachments
    • You may not edit your posts