New Page 2


Welcome to SDR!

  • Amused
  • Angry
  • Annoyed
  • Awesome
  • Bemused
  • Cocky
  • Cool
  • Crazy
  • Crying
  • Down
  • Drunk
  • Embarraded
  • Enraged
  • Friendly
  • Geeky
  • Grumpy
  • Happy
  • Hungry
  • Piratey
  • Poorly
  • Sad
  • Shy
  • Sneaky
  • Tired
  • + Reply to Thread
    Page 1 of 2 1 2 LastLast
    Results 1 to 15 of 16

    Thread: 15 Gallon project build

    1. #1
      HumanMachine is offline Registered User
      Enter Status Here..
       
      I am:
      Set you mood here...
       
      Join Date
      Apr 2013
      Location
      Escondido
      Posts
      142

      15 Gallon project build

      Hey folks, I'm back for round two. Technically an expansion to my original 8 gallon I was looking at doing something a bit more advanced just to see what I was capable of doing. The following is a short log of what's happened so far, my ideas and where I'm going with this.

      At first, It started with an idea. My girlfriend picked up a pre-drilled tank with a rather large drill hole (I think it was 2 inches) from the now defunct SD Exotic Reefs. Originally we were going to use it to upgrade one of her freshwater tanks, but she ended up going for a 30 gallon freshwater setup that is currently up and running.

      I started by ordering an overflow box. As you can see in the photo below. The cat oversees the work done to the tank and makes sure it's all water tight. I used some leftover black sealant and just put the box right near where the drill made its hole.


      I obviously had a bunch of leftover tanks from other mini projects that I've had going on, so I decided I'd attempt a DIY sump. After a visit to the local glass shop. I had a few baffles that I could put together in a sump. Granted. I put it in rather sloppily. In retrospect I should have used painters tape for cleaner edges but I'm not losing sleep over it. They're sealed, water tight chambers and I figure it's working just fine.

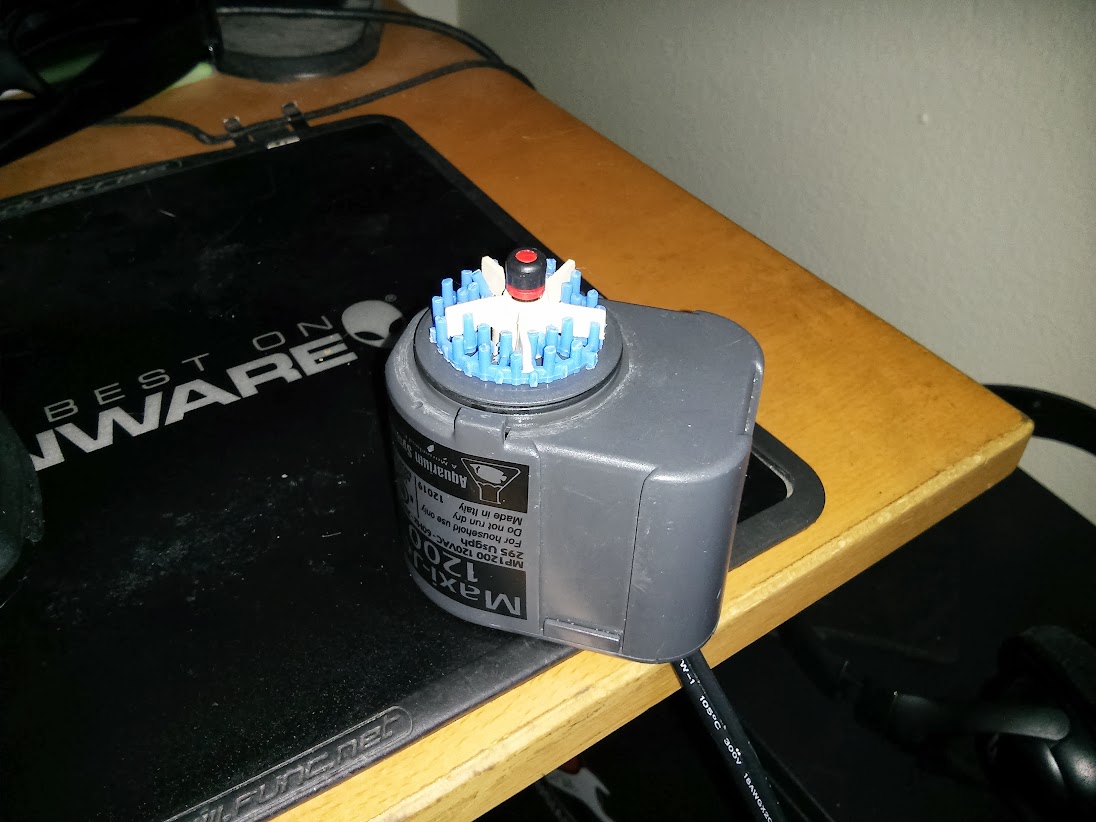
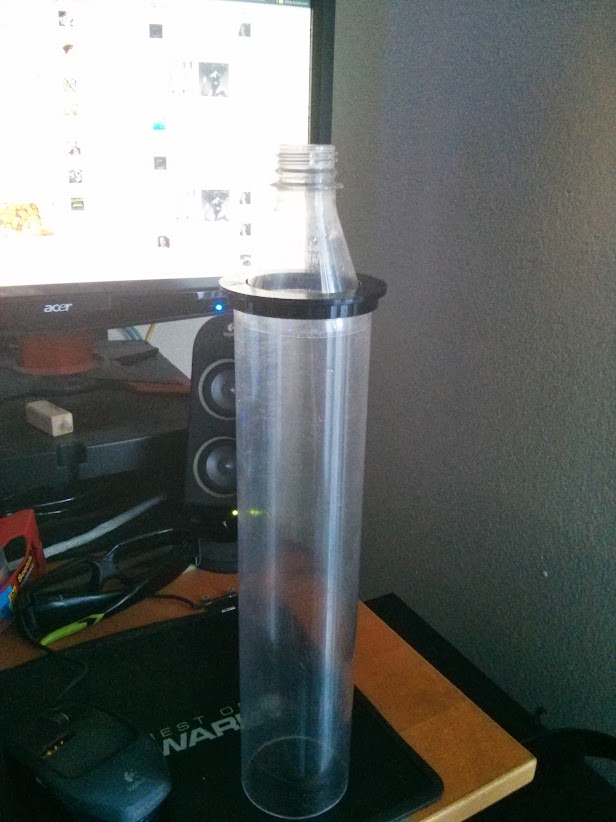
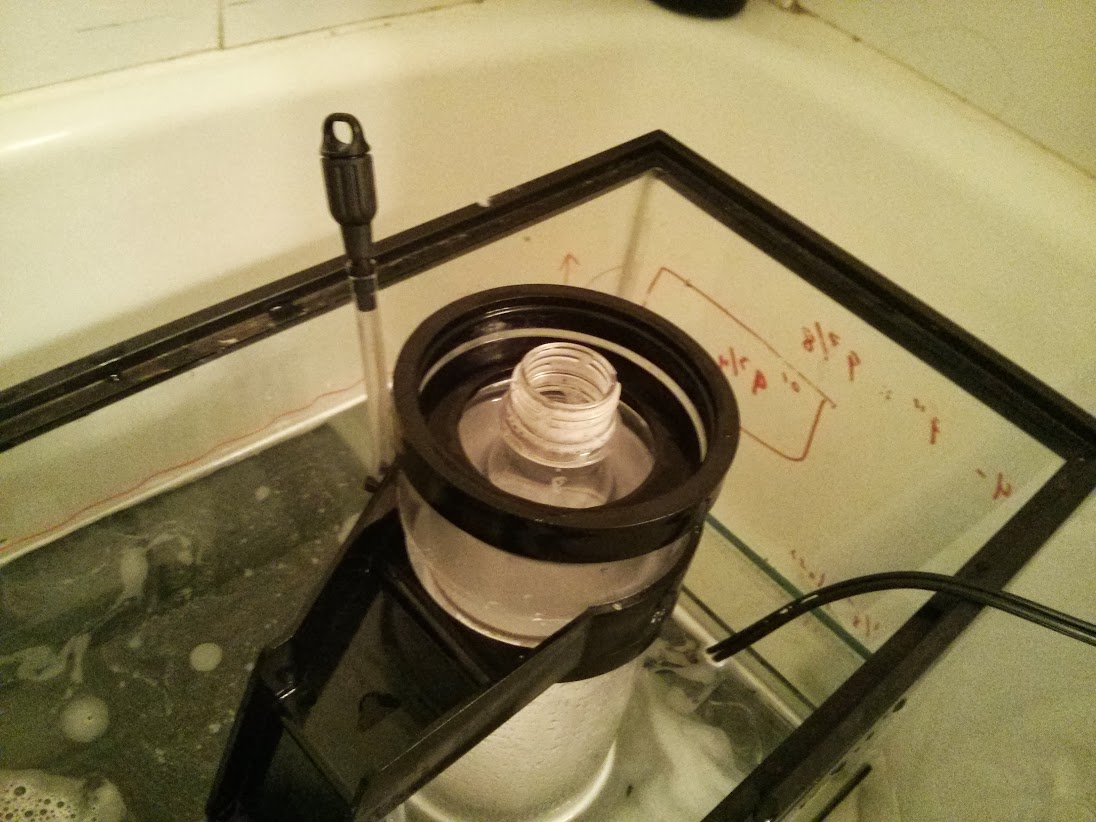
      At around the same time, I managed to pick up a Seaclone (yes I know) skimmer, rated at 100 Gallons. Being well aware of how awful they are, at the 30 dollar price tag, I figured I could make it function a little better. Below are the following experiments and progresses with it. I decided to go with the ever popular "bio-ball" mod for the maxi-jet 1200. A lot of people mentioned that the skimmer simply doesn't provide enough air for the application. Adding a needle-wheel style pump alleviates this. I went the cheap route and fashioned one from a bio ball. In the end, I trimmed up the impeller so that the needles were the only thing contacting the air as the venturi pulled air into the pump. The second mod is what I aptly named the "Dr. Pepper" mod only because I drink a lot of Dr. Pepper and it made sense at the time. One of the problems the skimmer has is that a lot of the bubbles don't properly get used for skimming, due to the inner chamber of the skimmer not being seated up to the neck of the cup. A lot of the bubbles end up back into the outside chamber and sometimes end up in the "return" it essentially allows the bubbles to start "further up" the neck of the seaclone, which is already too high to start with. A lot of people cut it, I just used the 20 oz bottle neck. I sealed up the leaky joints with some plumbers tape and finally I added a more precise valve.


      Here's one of the tests (new valve not in this photo)


      And the sump together.


      A little bit of Krylon fusion...


      A quick test fit. That long return ended up not working out. I re-elbowed it and used a 90* elbow to set the pvc nipple right above my return pump.


      A picture of the system running clean water. The Downpipe is black Spa-Flex tubing, a much flexier and more manageable flex tubing, held together with a coupler and a valve (out of sight) so that I can close the system up for cleaning or replacement of the sock and sump. Note, It's not going to be on the carpet next to my LED TV, it was just the most convenient place to put it at the time, for testing purposes... I'm reckless but not THAT reckless. That and I finally got the Power strip properly suspended in a safer spot.


      And that's it so far! I have it cycling at the moment, nothing else has been done so once I have better pictures of it on solid ground, I'll chime in with an update. There are a few things that I'd like to do differently, Like not rely on a single method for water delivery to my sump, The sump can handle a power outage just fine, as I break suction from both the return and the overflow really quickly. I just worry about the downpipe into the sump. Especially once I start getting a cleanup crew going. I'm currently contemplating methods of circumventing possible disasters other than to check it every time I clean the tank.
      Last edited by HumanMachine; 09-20-2013 at 02:35 AM.

    2. #2
      dpoltsdsu is offline Registered User
      Enter Status Here..
       
      I am:
      Set you mood here...
       
      Join Date
      Mar 2013
      Location
      Anaheim, SDSU
      Posts
      84
      Wow that is going to be a nice nano, looks like you'll be running a refugium as well? What do you plan on keeping in there?

    3. #3
      HumanMachine is offline Registered User
      Enter Status Here..
       
      I am:
      Set you mood here...
       
      Join Date
      Apr 2013
      Location
      Escondido
      Posts
      142
      Well I plan on keeping a starfish in there to feed my Harlequin shrimp. But that's technically what I'm doing now in my HOB Aquaclear Fuge. I was going to go with the basics. Chaetomorpha and maybe a nice pod population. I know a lot of people on other forums aren't huge fans of sumps on smaller systems but I figured, what the hell. It brings up my effective water volume. I'm not really a huge fan of snails in a fuge they can climb out of so that remains to be seen what I put in there.

    4. #4
      HumanMachine is offline Registered User
      Enter Status Here..
       
      I am:
      Set you mood here...
       
      Join Date
      Apr 2013
      Location
      Escondido
      Posts
      142


      Quick video of the sump put together.
      Last edited by HumanMachine; 09-24-2013 at 06:44 PM.

    5. #5
      HumanMachine is offline Registered User
      Enter Status Here..
       
      I am:
      Set you mood here...
       
      Join Date
      Apr 2013
      Location
      Escondido
      Posts
      142
      Due to room constraints. I decided to cycle this thing in place. I've successfully held water in it for over a month so I figured things would be fine. After rearranging the living room and securing the power strip to a safer, elevated position. She's well on her way


    6. #6
      nanoreef1 is offline Registered User
      My status is: 83Reefs
       
      I am:
      Amused
       
      Join Date
      Jun 2012
      Location
      San Marcos
      Posts
      7,495
      Looks great bro really like how the sump looks Were did u find the sump? Did u build it your self.

      Sent from my HTC One using Tapatalk 2

    7. #7
      HumanMachine is offline Registered User
      Enter Status Here..
       
      I am:
      Set you mood here...
       
      Join Date
      Apr 2013
      Location
      Escondido
      Posts
      142
      I actually built it from a leftover 10 gallon. It's not very cleanly built, there's silicone everywhere, but it's water tight and it works.

    8. #8
      Saltmeister is offline Registered User
      Enter Status Here..
       
      I am:
      Set you mood here...
       
      Join Date
      Jun 2013
      Location
      Tierrasanta
      Posts
      70
      Very innovative, a great DIY project! The skimmer idea using a plastic bottle top is just too cool. Looks like it's working perfect. Ya know, it's pretty hard to find good help these days....must be nice to have a willing paw (the cat).

    9. #9
      HumanMachine is offline Registered User
      Enter Status Here..
       
      I am:
      Set you mood here...
       
      Join Date
      Apr 2013
      Location
      Escondido
      Posts
      142


      Well after getting everything together a little more than a month ago, It's fully cycled and my parameters are good for coral. I'll be taking it slow from here on out and just babying the cycle until I get some stronger coraline growth. I did seed the tank with as much as a teaspoon of scrapings from an old thermometer in my other tank. As of the writing of this there are..

      A Couple of Skunk Cleaners.
      An Astrea snail
      Trochus snail.
      A small cluster of stomatella that I cultured in my small tank (love em!)

      The fuge has an emerald crab
      and a few Stomatella.

    10. #10
      nanoreef1 is offline Registered User
      My status is: 83Reefs
       
      I am:
      Amused
       
      Join Date
      Jun 2012
      Location
      San Marcos
      Posts
      7,495
      Looking real nice!

      Sent from my HTC One using Tapatalk 2

    11. #11
      HumanMachine is offline Registered User
      Enter Status Here..
       
      I am:
      Set you mood here...
       
      Join Date
      Apr 2013
      Location
      Escondido
      Posts
      142
      First major water change happened today. Went with red sea coral pro and the little frags I have stored in the tank don't seem to mind. In fact a few of them have never been more plump and open. Added another skunk cleaner (actually went back and got the skunk cleaner that was originally paired with the first one I got, from the same tank, because I felt bad) and they're hilarious. I can't get my hand in the tank without being cleaned thoroughly. They're eating, healthy, and I'm showing signs of some coraline growth, but I may just be hallucinating.

      New heater acquired after the old one that I got used from a forum member, took on some water and burned itself out. Went with an Eheim Jager 75 watt.

      The skimmer I modded has been working just fine. The bioload has been pretty low, so it doesn't skim much, but it works well enough.

    12. #12
      HumanMachine is offline Registered User
      Enter Status Here..
       
      I am:
      Set you mood here...
       
      Join Date
      Apr 2013
      Location
      Escondido
      Posts
      142
      I'm also going to be replacing the light soon. I've got a 120w led ebay style light that I've had some pretty good success with. I wish it was adjustable but alas.

    13. #13
      HumanMachine is offline Registered User
      Enter Status Here..
       
      I am:
      Set you mood here...
       
      Join Date
      Apr 2013
      Location
      Escondido
      Posts
      142


      The Pagoda coral made the cut. it's been in for about 3 days now. As did a couple of mushrooms and a test frag of sps

    14. #14
      nanoreef1 is offline Registered User
      My status is: 83Reefs
       
      I am:
      Amused
       
      Join Date
      Jun 2012
      Location
      San Marcos
      Posts
      7,495
      Sweet!

      Sent from my HTC One using Tapatalk 2

    15. #15
      HumanMachine is offline Registered User
      Enter Status Here..
       
      I am:
      Set you mood here...
       
      Join Date
      Apr 2013
      Location
      Escondido
      Posts
      142
      Got some corals in along with temporary lighting. I haven't lost anything yet. I also finally got the netting up, so I feel like I can finally keep fish without them jumping out I hope!
      The Duncan I've had for a while looks a little angry, but I can't figure out why. Even my sensitive highlighter corals, frogspawn and my Pagoda are doing even better in this tank. I've got a new light kit coming in a few weeks which I'll be doing a review on, so sit tight for that one.


    + Reply to Thread

    Thread Information

    Users Browsing this Thread

    There are currently 1 users browsing this thread. (0 members and 1 guests)


    Posting Permissions

    • You may not post new threads
    • You may not post replies
    • You may not post attachments
    • You may not edit your posts